Mail Delivery Boxed Meals, a Compare and Contrast (ongoing)

Our lives aren’t so crazy busy that we can’t possibly make dinner for ourselves every night, but we sometimes really don’t want to do much beyond open a box and heat something up. Last time we were in Chicago, we picked up 10 frozen Lou Malnati’s pizzas to keep in our purchased-for-the-occasion deep freezer, for those very moments.

Blue Apron

Blue Apron’s Koren Popcorn Chicken (with added broccoli because we are adults)

But we like to cook and that means that no matter how long the day is or how late we get started, the pots and pans come out and we set to chopping. When we were first married, our living situation was unique and we had to be careful with how elaborate our meals were or how long they took, so we went with a Blue Apron trial which I documented here. That lasted about a year, into a new apartment with more space and time, a long break, then two short revisits over the following two years.

By the end of our third round with Blue Apron, we were decidedly done. The portions, we swore, got smaller. The dishes all seemed to require a fair bit of spicing up plus an addition of extra flavors and even then, we were disappointed about 75% of the time. All the while, I had been receiving Hello Fresh offers in the mail so after a bitter disappointment with BA (the saddest ramen on earth), I paused those deliveries and signed us up with the other. This was a very good decision, it turned out.

We’ve been incredibly happy with the quality and portions of Hello Fresh, I’d put them at about a 90% success rate five boxes in, something we hadn’t been able to say about most of our time with Blue Apron. Thinking that we’d have to spice up the dishes or supplement them with extra veg like we’d been doing previously, we did so for the first three meals. This resulted in way too much food so we stopped. I had a deal that fed us through all of January, four boxes for $54 per box, four meals a week. To continue that quantity after the promo period would have meant spending about $78 per week (with shipping), on four meals. We never spend that much in groceries per week (though that is an average decent dinner out with cocktails once a week, which we’d still do meal plan or no), and we knew spending that much per month would be more than we’d feel good about. After the trial month, I cut it down to two meals per week for about $45. Economically it’s smarter to go with more meals per box but overall, it’s just too much to spend knowing we’d have zero leftovers.

Screen Shot 2019-02-10 at 11.01.19 PM

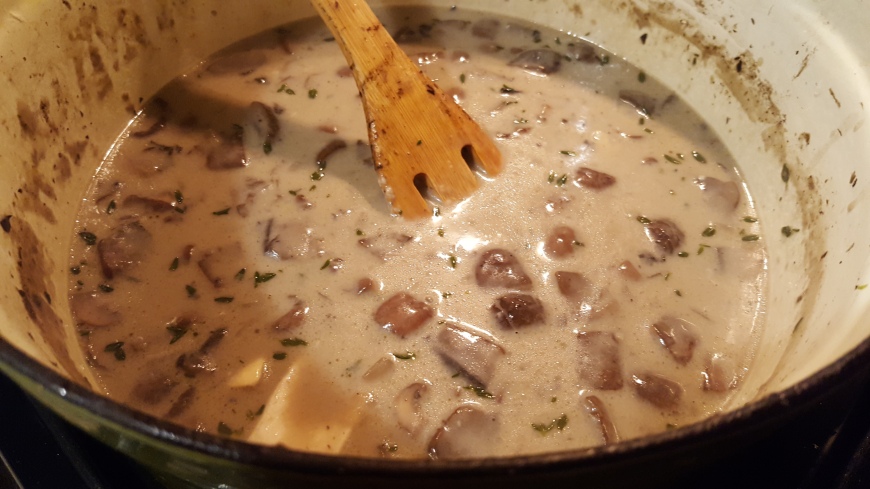
Hello Fresh’s delicious steak, that sauce was a win!

Aside from portions, what seems to set Hello Fresh apart is that it isn’t afraid to include sources of heat (packets of peppers, spicy sauces, single-serve Sriracha), extra spices, and simple but very tasty dressings for salads. The sourcing is always fresh if not organic (which is just a label and I don’t put a lot of stock in it anyway), sometimes local, always the exact right amount, and neatly packaged. While their packaging isn’t nearly as recyclable as BA’s, a drawback, it takes up less room in the fridge, with each meal in its own paper bag, aside from the proteins. This makes for easy and safely separated storage, compared to BA where the ingredients are thrown together and each must be set located in order to pair with each recipe. I also like that many of their meals can be made without their ingredients, meaning each meal is easily recreated using ingredients at the grocery store.

Feeling adventurous, I cancelled BA altogether after giving detailed dish reviews and feedback on their cancel screen (hey, they asked). I have also paused Hello Fresh for next week’s delivery so we can try Home Chef. I believe that Home Chef also distributes meal kits in grocery stores but I’ve never seen that where we are (I’ve also never looked and if I’m going to the grocery store, I’m going to get a lot and fresh ingredients, not frozen take-and-bake). Their special promo is for three meals per week for three weeks and costs about the same as Hello Fresh’s two meals per week ($54 with tax, free shipping during the trial). The dishes look really good, there are steaks and large pieces of fish, and the sauces and sides seem a little more advanced than we’ve seen so far from either HF or BA.

Once the trial for Home Chef is over, we’ll try Plated again. I had a bad experience with them a few yeas ago during a BA break and an even worse experience with their customer service after reporting the issue, so I’m not tagging them here just yet. I’ll review when the time comes and update the table below to keep track of differences.

They all have the same setup: Double-sided instructions with images, calories, time to prep and cook, and wine pairings.

Blue Apron
Pro: Most if not all packaging is recyclable, ice pack can be kept and reused until it breaks, great for inexperienced cooks or those with little kitchen cookware, pricing is better than average for meal plans of this type.
Con: Portions are small, flavors as often lacking and require additional spices, lots of packaging and not much of it is contained so it requires gathering and organizing before prep, the app is frustrating to use and frequently bounces a person out to the full site or to the wrong screens.

Hello Fresh
Pro: About half of the packaging is recyclable, the dishes are very tasty and require almost zero additional flavors or ingredients to bulk them up, the techniques are slightly elevated for more experienced cooks, the portions are enough for two full grown adults who like food, same reusable ice pack included, a well-done app that includes steps, a timer, and reminders.
Con: Only half of the packaging can be recycled (and there are a lot of plastic bags not marked with recycle symbols). The dishes can be tricky for only one person to make, some of them require timing that works better with two sets of hands, the price is higher than BA

Sloppy Joe, Slop Sloppy Joe

All credit for that title goes here.

A few weeks ago, my friend asked me for some dishes that would feed a family, made ahead of time and frozen, as the mom was facing surgery and friends were pitching in to prep meals. I sent her a few ideas, but for my money and time, it’s hard to beat a giant vat of Sloppy Joe’s for volume, satisfaction, and tastiness. It freezes well, reheats well, and can be eaten plain, on a bun, with slaw or chips, etc.

I almost always double this recipe.

Mom’s Sloppy Joe

Ingredients

2.5 lb. ground beef (90%/10% if you can swing it, 80% will produce a lot of fat but you can still go with it)
1 med. yellow onion, chopped fine
1 c. ketchup (this is the only time ketchup is in our home, we are mustard people)
1 T. vinegar
2 T. brown sugar
1/2 t. dry mustard (you want the kick of the dry you don’t get with prepared)
3T. Worcestershire Sauce
water as needed

Brown beef and onions together until onions are translucent and fat renders out, drain fat.

Add all ingredients to large pot and add beef and onions, stir until well mixed.

Simmer two hours, stir occasionally. Add water to thin as needed.

****

And that’s it. If I’m making some for later, I wait until it’s cooled, cold is even better, remove whatever fat has come to the top, and pack it in storage containers to stick in the freezer. It microwaves or stovetops back to life perfectly.

I know a lot of people put celery, cumin, or tomatoes in their Sloppy Joes but this is what I was raised on: simple, straightforward, no frills. It’s tangy and sweet, savory, and perfect for cool weather. Enjoy!

(I tried to find a good photo to add here but every image I found had visible carrots, tomatoes, or celery in the meat and rather than mislead you, this is a plain post.)

Olive Garden’s Pasta e Fagioli

Between the ages of 17-19, I worked at The Olive Garden next to Spring Hill Mall, in Suburban Chicago, Illinois. I was there for the introduction of The Gateway to Hell, aka, The Never-Ending Pasta Bowl, and I worked there before they renovated the place into the Tuscan-inspired stucco style it is today (it’s better now). I often told people that I’d eat off the floors, the place was so clean. It was the best and most professional restaurant service training I’ve ever received, before or since, and I stand by the quality of their ingredients. It’s a guilty pleasure going there, minus the guilt. It’s not real Italian, the way fast food burgers aren’t really burgers, but it’s its own thing and has its place.

They had only three soups back then, with the spicy potato sausage soup being the new addition (it was a long time ago), and their minestrone which I would make if I could figure out how to keep the veggies from becoming mush.

This chili-style soup though, was always a go-to. It’s satisfying and can be customized in lots of ways for your taste requirements.

Copycat Olive Garden Pasta e Fagioli

Ingredients

  • 1 lb lean ground beef or mild Italian sausage
  • 2 Tbsp olive oil , divided
  • 1 1/2 cups chopped yellow onion
  • 1 cup diced carrots (about 2 medium)
  • 1 cup diced celery (about 3 stalks)
  • 3 cloves garlic, minced (1 Tbsp)
  • 3 (8 oz) cans tomato sauce
  • 2 (14.5 oz) cans low sodium chicken broth or beef broth
  • 1/2 cup water, then more as desired
  • 1 (15 oz) can diced tomatoes
  • 2 tsp granulated sugar
  • 1 1/2 tsp dried basil
  • 1 tsp dried oregano
  • 3/4 tsp dried thyme
  • 1/2 tsp dried marjoram
  • Salt and freshly ground black pepper to taste (I add a lot of pepper, it’s great peppery. Definitely test often for salt, it’s very bland without a lot)
  • 1 scant cup dry ditalini pasta (I used a full cup, I’m a rebel who likes pasta)
  • 1 (15 oz) can dark red kidney beans, drained and rinsed
  • 1 (15 oz) can great northern beans, drained and rinsed
  • Finely shredded Romano or Parmesan cheese, for serving

Instructions

  1. Heat 1 Tbsp olive oil in a large non-stick saucepan over medium high heat, crumble in ground beef or sausage and cook, stirring occasionally until cooked through. Drain fat from beef then transfer beef to a plate, set aside.

    Heat remaining 1 Tbsp olive oil in same large saucepan, onions, carrots, and celery over medium-high heat until tender about 6 minutes, add garlic and saute 1 minute longer. Reduce heat to a low, add tomato sauce, beef broth, water, canned tomatoes, sugar, basil, oregano, thyme, marjoram and cooked beef then season with salt and pepper to taste. Cover with lid and allow to simmer, stirring occasionally, until veggies are soft, about 20 minutes.

    Meanwhile prepare ditalini pasta according to directions on package, cooking to al dente.

  2. Add cooked and drained pasta to soup* along with kidney beans and great northern beans. Thin with a little more water if desired. Allow to cook 2 minutes longer. Serve warm with grated Romano or Parmesan cheese.

    * If you don’t plan on eating all of the soup right away I recommend adding the pasta to individual servings. Then whatever is left over you can add the pasta to that the next day. Otherwise the pasta get’s really soggy and soup doesn’t have enough liquid.*

    ****

    * This is extremely true. I made the pasta and kept it in a separate container once it cooled, then microwaved it and added it to the soup as needed. It WILL get soggy and gross, so definitely do this if you don’t plan to eat the whole batch at once.

    You want this thick like chili, with some liquid throughout.

    pasta_e_fagoli-2

    Recipe author’s photo, highly accurate. More cheese = more better!

It’s Cranberry Season: Let’s Make Relish!

I grew up with cranberries in the can. You know the one, you cut open both ends and sllllllide it out onto the plate with a floop. I love that stuff, and I’m not afraid to say it. My grandma sent me cans in care packages when I was in college all year long.

Last year, hubs and I had our own little Thanksgiving so I decided to thwart tradition and make cranberry sauce from scratch for the first time. This stuff was, without hyperbole, the best. We wound up putting it on ice cream and eating it by the spoonful at random moments. Cranberry season is fleeting so this year, I plan to buy a few bags to keep in the freezer so I can make this glorious relish whenever the mood strikes.

Cranberry Relish

Ingredients
  • 1 1/2 cups granulated sugar
  • 1/2 cup cranberry juice (NOT CRANBERRY JUICE COCKTAIL – the plain juice may be hard to find, but you’ll need it so don’t settle)
  • 1/2-3/4 tsp fresh grated ginger*
  • 1/2 tsp ground cinnamon*
  • 16 ounce bag fresh cranberries
  • Zest of 1 orange – just the orange part
Instructions
  1. In a large, heavy saucepan, add sugar, juice and spices.
  2. Cook, stirring often, until sugar dissolves, syrup is clear and comes to a rolling boil, about 3 minutes.
  3. In a colander, rinse and pick over the cranberries to remove any mushy ones.
  4. Add cranberries to boiling syrup and continue cooking, uncovered, just until they begin to pop, about 2-5 minutes (set the timer). Be careful not to cook them too long or they will get mushy.
  5. Skim the foam off the surface with a metal spoon and discard.
  6. Remove from heat, stir in orange zest and cool to room temperature, uncovered.
  7. Place in container, cover and store in the fridge for up to 3 months.
Notes
If you prefer to have it smoother, once you add in the orange zest either use an Immersion blender on it or run it through a food mill/sieve to remove any pieces.
*****
** Don’t leave these out, even if you don’t like ginger or cinnamon, they are crucial to the overall flavor. It winds up having an edible holiday spice profile, if that makes sense.

The berries do break down the more you stir and boil them, but if you want to have a smoother sauce that has some chunks, you’ll want to mash them. Either a potato masher or an immersion blender work well. You will likely never get it very smooth unless you strain several times, so embrace the chunk.

Cranberries will freeze well and keep their integrity, which I didn’t realize last year when I made this. This time however: Cranberries in spring and summer! I can’t wait.

Church Pot Luck Hot Chicken Salad

My mother made this dish whenever it was cold, she had to bring a dish to pass, or I asked for it. These days, I can make it myself but it’s so perfect for cool days and nights, and when you need a bit of crunch in your life. Not that central Ohio knows anything about cool days and nights, my a/c is still on. Sigh.

Hot Chicken Salad

6 chicken breasts, cubed and browned
2 cans cream of chicken soup


2 cups celery, diced (about fingernail-sized)
1 onion, chopped (same as celery but no smaller than that)
3/4 c. mayo
1 t. Worcestershire sauce
1/4 t. fresh ground pepper
1/4 t. salt
2 T. lemon juice (use the real stuff, not the bottled)
3 – 6 oz. sliced almonds
For topping:
1 c. potato chips, crushed
1 c. grated cheddar cheese
Mix browned chicken with celery, almonds, and onion.
In a separate bowl, mix together soup, salt, pepper, mayo, lemon, and Worcestershire sauce.
Pour both mixes in alternating layers, into greased 9″x 13″ pan. Top with chip & cheese mix. Bake for 45 minutes or until bubbly and hot.
******

That’s it. No more, no less. I made this for an old boyfriend once and he chided me for making “a casserole”. I barely defended it because I freaking love casseroles and PS, WHO DOESN’T?! so I made it with his noted protest. Twice.

My friend’s sister is preparing frozen meals for her friend who’s about to undergo major surgery. My friend asked me for some suggestions and recipes that would fit the bill, so I sent her six suggestions. Of those six, this was one of them along with my mom’s recipe for Sloppy Joes, with which a person can never go wrong. Both of these recipes are great for families though I’ll be honest and say that I have no earthly idea if this chicken salad will freeze. Naturally, the hot, crispy, bubbly cheesy topping will be lost when freezing and that will be a bummer, but not as much a bummer as major surgery, right?
So hug your loved ones, be grateful for your health (hopefully), and make this dish when fall actually shows up.

SFS_Hot_Chicken_Salad-16

I didn’t take this photo but it’s what it looks like, so there you go. Though it looks like red onions are in there, and I can’t recommend that.

Lu Rou Fan: Braised Pork Belly

I’m gonna start this one with the words I spoke after the first bite: “HOLY CRAP.”

You can find pork belly in a lot of places but my go-to will always be an Asian market. The prices are usually cheaper there, it’s always fresh, and while you’re at it you can get everything you need to make this ridiculously good dish. But be warned: Don’t think you’ll knock this out inside of an hour. You’ll need about three from start to eating, so make a snack. Also, make sure your pork belly does not have bones. That can sometimes happen and it’s a huge pain to work around.

If you decide to attempt this dish, I highly recommend watching the video (posted below). The ingredients and instructions don’t really do the process true justice, though I did clarify some of them for you here. My edits are in red.

Ingredients

Marinade the pork belly

2 Tbsp of light soy sauce
1 Tbsp of Shao Xing wine (can sub dry sherry or Japanese sake)
500 g of pork belly (this is just over 1 lb)

Fried Shallots

2 shallots
1/2 cup of vegetable oil

Braising the Pork Belly

1/3 cup of Shao Xing wine
2 Tbsp of soy sauce*1
1/3 cup of fried shallot
3 slices of ginger
2 pieces of star anise
1/4 cup rock sugar (can sub for white granulated sugar)
3 cloves of garlic
1 tsp of dark soy sauce
1 tsp of five spice*2
1.5 liters of water (if your pot/wok is air-tight, use less water) (this is just over 6 1/3 cups)

Needed to Add to Finished Dish

1 Egg (she doesn’t say this in the video, but soft cook your egg, about 6-7 minutes)
Bok choy (sautee with a bit of salt, pepper, and garlic powder)

Instructions

Cut the pork belly into strips, then cut it into small size, about half inch thick.
Mix it with 2 tbsp of soy sauce and 1 tbsp of Shao xing wine. Set it aside for at least 30 minutes.

Fry the Shallots
Cut the shallots into thin strips, add 1/2 cup of oil to a small sauce pot, fry the shallots on low heat. It will take about 5-8 minutes to get them golden brown. Strain and set the shallots aside.

Braise the Pork Belly
Heat up your wok.*3 Add in your pork belly without oil. Stir fry it on medium heat. Once you see it is getting a little burned on the bottom, then add the Shao xing wine, soy sauce, rock sugar, ginger, garlic, star anise and a pinch of five spice. Keep stirring it until the sugar melts. Pour in 1.5 liters of water. Add in the fried shallot we made before and add a tsp of dark soy sauce for color. Bring it to a boil. Turn the heat to low, let it stew for 1 -2 hours, depends on how tender you want.

After 1 and half hours the sauce is still pretty thin and there is a lot of fat floating on the top. Skim off the fat so your pork won’t be too oily. Once skimmed, turn the heat to high, start reducing the sauce. After several minutes, you will see a lot of bubbles and the sauce will get thick. When the sauce is almost gone, you can turn off the heat. The pork should be lacquered and there won’t be much sauce.

Her voice is adorable and she totally chows down at the end. It’s great.

20171003_142829

Great success!

My Notes:
*1: 
Buy good soy sauce. Not Kikoman, not the stuff in your standard grocery store. Go to an Asian market and behold the choices. This is the one we get and there’s a noticeable difference between it and the grocery store stuff. It’s rich, bodied, and not just brown salt water.

*2: 
If you’ve never cooked with Chinese Five Spice, you need to GET ON IT. It’s kind of clove, kind of allspice, kind of cinnamon… but it’s also none of those things. Its flavor is unique and powerful, and you’ll find you can mix it with so much to great result. Last night in fact, we mixed some with soy sauce, gojuchang, and ginger/habanero preserves, and then poured it over rice and sauteed shrimp.

*3:
We do not own a wok. Or rather, we do not own the right BTUs for a wok. We made this in a regular larger frypan and it turned out just fine. Don’t worry about not having the right cooking tools for this recipe, it will work out.


Creamy Roasted Mushroom & Brie Soup

Yesterday we talked Chickpea Cauliflower, today we’re talkin’ bout shrooms. Mushrooms, that is. Mushrooms with brie, even! This soup is decadent, fabulous, needs no adjustments or changes even though I made some, and is very, very hard to resist several helpings. Here is the original recipe in total, with my notes or edits marked in red. Let’s get cooking!

Ingredients

1 tablespoon oil

1 1/2 pounds mushrooms, quartered (I try to use Baby Bellas, I do not recommend large portobellos due to their copious gills nor do I ever cook with white button, no flavor)

2 tablespoons unsalted butter

1 onion, diced

2 cloves garlic, chopped (I always use more garlic, at least double if not triple)

1 teaspoon fresh thyme, chopped

2 tablespoons flour

1/2 cup white wine (or broth)

4 cups vegetable broth or chicken broth

4 ounces brie, cut into 1 inch pieces (or wedges, the rinds are easier to fish out)

1/2 cup milk or heavy cream

salt and pepper to taste

Directions

  1. Toss the mushrooms in the oil, place on a baking sheet in a single layer and roast in a preheated 400F oven until they start to caramelize, about 20-30 minutes, stirring them up halfway through.*
  2. Meanwhile, melt the butter in a pan over medium heat, add the onions and cook until tender, about 5-7 minutes.
  3. Add the garlic and thyme and cook until fragrant, about a minute.
  4. Add the flour and cook for 2 minutes.
  5. Add the wine and deglaze the pan.
  6. Add the broth and mushrooms, bring to a boil, reduce the heat and simmer for 10 minutes.
  7. Add the milk and brie, let the brie melt, fish out the rinds and season with salt and pepper to taste before pureeing to the desired consistency and enjoy!

Slow Cooker: Implement steps 1-4, place everything except the brie and cream into the slow cooker and cook on low for 6-10 hours or on high for 4-6 hours before adding the brie and cream, letting the brie melt and pureeing.
*Option: Saute the mushrooms in a pan with the onions instead of roasting them (I did this, it was a good move. If you do this, reverse steps #4 and #5)
Option: Add 2 tablespoons white miso (I didn’t do this but if you do, and you should, don’t add salt until after you add the miso and its flavor develops)

20170124_182501

I sauteed the onions and mushrooms together in pot rather than using the oven to roast.

20170124_190659

Soup mostly finished, with brie wedges slowly melting.

Roasted Chickpea & Cauliflower Soup

The fireplace is stocked, the leaves are crunching, and fall is slowly descending upon the Midwestern United States. It’s soup season! This recipe is so great, so solid, I make it about once a month. I do make a fair amount of changes to it to bulk it up though (noted in red). It’s vegetarian and gluten-free, if you’re into that kind of thing.

For the Soup

1 cauliflower head, cut into florets (about 4 cups total) (use the stalks and stems!)

1 (15 ounce) can chickpeas, rinsed and drained (I double this)

5 garlic cloves, peeled (I double this too because I love roasted garlic)

4 tablespoons extra-virgin olive oil, divided

1 tsp. ground cumin

1/2 tsp. salt

1/8 tsp. paprika

2 medium Yukon gold potatoes, peeled and cubed (about 2 1/2 cups total) (I use white baking potatoes, it’s fine that way, and I also double the amount to bulk the soup up)

1/4 tsp. black pepper

1/4 tsp. nutmeg – this rounds out the flavor and adds a lovely nutty note

4 cups vegetable broth (or chicken broth if you want extra flavor with less added salt)

1 cup water

1/2 cup heavy cream (you can get away with half & half but you need to thicken the soup unless you plan to omit cream and use a cornstarch slurry instead)

For Garnish

Reserved roasted cauliflower mix (I set aside at least 1/4 of the total roasted veg, the crunchy chickpeas are great)

Red pepper flakes

Fresh thyme leaves

Heavy cream to drizzle

Instructions

  1. Pre-heat your oven to 400 degrees. On a large rimmed baking sheet, toss the cauliflower florets, chickpeas and garlic cloves (just leave them whole) with 3 tablespoons of the olive oil and the cumin, salt and paprika. Roast in your pre-heated oven for 30 minutes, stirring once half way through. Remove from your oven and set aside. Reserve about 1/2 cup for the garnish. (I remove 3/4 of the veg after 30 mins to use for the soup but I roast the rest a lot longer since I like the garnish chickpeas crunchy and the cauliflower a little burned. Figure 45 minutes for that 1/4, give or take, especially if the cauliflower lets off a lot of steam before it browns)
  2. Meanwhile, heat the remaining 1 tablespoon of olive oil in a large pot over medium heat (I use cast iron enamel dutch oven, but you can use whatever as long as it’s big enough). Add the cubed potatoes and black pepper. Cook for about 2 minutes, stirring frequently. Add the vegetable broth and the water and increase the heat to bring the mixture to a boil. Once boiling, turn the heat down to maintain a simmer. Simmer, uncovered, until the potatoes are very soft, about 15-20 minutes. Remove the pot from the heat. Stir in the roasted cauliflower mix.
  3. Puree the soup using an immersion blender. Alternatively, you can use a food processor (this is what I use) or blender, working in batches if necessary and being careful when transferring and blending hot liquids. Return the pureed soup to the stovetop and gently re-warm it. Stir in the heavy cream. Season to taste with salt and pepper and nutmeg, if you use it.
  4. To serve, ladle the soup into bowls and top with the reserved roasted cauliflower mix, red pepper flakes, fresh thyme leaves and a drizzle of heavy cream, if desired. Enjoy immediately.
  5. Leftovers can be stored in an airtight container in your refrigerator for 2-3 days.

My Recipe Notes

There is not much liquid in this soup, only five and a half total cups plus whatever incidental liquid comes from the pureed veggies. Using my changes and additions, I make the recipe the way it’s stated above. When it comes to the liquid, I sometimes add another cup of water since I’ve doubled the potatoes. Often, this comes out perfectly. Definitely test for accurate seasoning, it may need more salt and pepper due to the addition of more potatoes.

I include the heavy cream but for the lactose intolerant, make a cornstarch slurry, bring the soup to a low simmer, and it should thicken the soup up nicely. For the final drizzle, you could water down a bit of yogurt or throw it in there whole. The garnish really makes it, though. The fresh thyme, the red pepper flakes, and the crunch and firmness of the roasted veg are just wonderful. My husband and I get two big bowls out of the amended recipe with two medium portions leftover. Using the recipe as-is, we get two large servings with a tiny (barely one serving) amount leftover. Have at it and enjoy!

IMG_20161019_203644

Chop, roast, garnish, devour.

IMG_20161025_203303

This might be the prettiest soup I’ve ever made.

Thanksgiving 2016: Traitors

First of all, there was no turkey. SEVEN DOLLARS for two tenderloins? No way. Roast it was, and we were ok with that.

Pinterest was on deck. I had the whole day to prep and cook, and planned to tackle two things I’d never made before: A sirloin tip roast and potato rolls from scratch. I lounged and watched movies, checked emails, played some games on my phone, and somewhere around 1 realized I should probably get going if we were to eat around 5:30.

I checked my recipes, one required at least two hours total (the roast), the other about an hour plus bake time (the bread) and everything else could be done as the roast rested. The Yorkshire pudding batter was made first thing and sitting out all day so it could come to room temperature, I salted the roast when I woke up Thanksgiving morning, then I made my spice mix for the rub. I fixed myself a drink and chilled out… about two hours longer than I should have.

Checking the bread recipe a second time, I saw that there was not one, but two rises, each taking one hour. Whoops. I sprung into action and got out the KitchenAid. Warm water, yeast, wait, you know the bit. Unfortunately, I lost count of my flour cups around the 3rd or 4th due to distraction, and rather than add too much, just went with it. It was clearly the 3rd cup because that dough was sticky. I added flour until it pulled away but it still seemed stickier than it should have. Eventually after much flour adding bit by bit, it came together and I set it aside to rise for the first time.

Onto the meat. Spices rubbed, trussed, sear. Hmm, Dylan sure does seem to be coughing a lot out there and my eyes hurt a little.
“What’s in that rub?”
“(list list list) red pepper”
“… honey, you just pepper sprayed us”.
Whoops. What kind of crazy person makes a recipe involving red pepper flakes and then tells you to introduce it to a very hot, out-in-the-open pan? Well, most of the roast recipes I saw, actually. So I cracked open the door and kept on. Seared, into the oven for at least an hour until temp reached, then hang out in the warm oven for another 40 minutes or so.

The dough rose and were single-serving portioned off into a buttered baking dish to rise for another hour, the roast was doing its thing, and I waited. By now, it was rounding about 6. Well past my intentioned dinner service time, but I reminded myself that it was a holiday, I was enjoying cooking without having to do it after a long day of work, and I had wine.

By about 7, the roast was almost to temperature, the bread was in the oven (if you have only one oven in your kitchen and cook a lot, get a convection toaster oven. I cannot tell you how invaluable mine has been), the cauliflower was chopped and as soon as the roast came out to rest, the Yorkies went in along with the veg. It was all coming together so well that by the time the peas were whizzed up in the food processor, I was starting to panic that I’d forgotten something major.

The table set, the wine poured, the roast out and cut, Yorkies puffed, bread finished, potatoes mashed, gravy peppered, peas minted, cauliflower roasted, can of cranberry sauce plopped into a dish. We sat down to dinner and took our time.

It was a smashing success. My family was horrified that we were just picking our forks up at 7:45, but that’s close to when we eat normally so it wasn’t a stretch. The roast was AMAZING and I have actually made two since. I just picked up another at the store yesterday for half price, and aside from the time it takes to do, it great for having around. We get about three meals and some meat snacks out of one, and when eaten with horseradish cream, it is just the best. We finished all leftovers within about five days, and the rolls are fantastic frozen then brought back to life.

Side note about that, actually: I didn’t realize that yeast lives after it’s frozen. I took the advice of some commenters from the recipe and shaped all the dough into balls then laid them on a greased plate to stick in the freezer. I left them there overnight then took them out, broke them apart and threw them into a freezer bag. Since then, I’ve taken a few out here and there, let them come to room temperature at least an hour if not two or longer, then bake normally. Sure enough, they puff right up and come out of the oven identical to the first day I made them. I can see why people go crazy about bread. It’s a pain and it takes forever but it’s so worth it. Nonetheless, I have several bread recipes pinned that I plan to do soon. Given Chicago’s weather forecast for the weekend, this may be the time I do it.

temp

The night was lovely. We missed our families as you do, but were so incredibly grateful to have the day together and a quiet dinner to eat and enjoy one another without all that goes along with a crowded house. After it was over, we loaded the dishwasher for round one and I retired to our room to watch White Christmas (Dylan refuses Christmas that early but I need it). I’ll be honest and say that I wish we could do this every holiday, but I know that if we miss Christmas, I will be heartbroken. There will be turkey and maybe a ham, food we’ve eaten every Christmas of my life in some way or another, and lots of chaos and Fred peeing on mom’s carpet, but it will be good. It’s always good.

Thanksgiving for Two

T-minus four days to Thanksgiving. While we’d normally drive 30 miles (and an hour) west to my mom’s and spend most of the day cooking and hanging out, this year Dylan has to work a five hour shift likely in the middle of the day. If mom’s house was only a mere 20 or 30 minute drive, we’d just head over before or after but as it happens, an hour there and then typically more than that back on a holiday night is not really ideal. Plus, honestly, we’ve never had a holiday of our own in our own home, and when we realized he’d be working for some of it, we kiiiiiinda…sorta…. hoped it would keep us in for the day. And it is.

Meal planning for a traditionally huge supper when only two people are eating is a pain. I grew up with all the standards: turkey (which we’ve discovered over time nobody really likes all that much), buttery mashed potatoes, a green veg of some kind or another, two styles of stuffings, gravy made from both jars and the drippings with help from some Gravy Master and Wondra, canned cranberry sauce (the only kind that counts), strange Jellos that my Aunt Jan makes yearly without fail, appetizers of a veggie tray, meats, cheeses, some baked things my sister will choose the day or so before, and wine. It almost never changes and when it does, usually by me, there are frowns. Ah well.

I look forward to it every year, though. These things I have come to count on: the smells and hustle to get it all going, the comfort of the only childhood home I’ve ever known, the guard-change of my two older sisters and me doing all the cooking instead of my mom who tires out faster these days, opening the doors and windows because the kitchen gets so hot, the annoying tradition of my brothers-in-law planted in front of the television doing nothing while the women run about in a frenzy, the pride I have to see Dylan stay in the kitchen asking how the can help (his offers are almost always refused but noted), and the general security in the knowledge that of all the changes in life, holidays at mom’s are basically the same each year, give or take a few family members.

The downsides are few but weighty. Since Dylan and I got serious three years ago, we’ve spent every family holiday at my mom’s. We’ve come home late and exhausted, we’ve spent hours cooking (or trying to help) only to watch the food devoured in 15 minutes flat. We’ve both been so tired to drive home in the evening that we’ve flipped for who had to do it. We’ve left Fred alone all day or brought him with to chase him around the house making sure he didn’t pee on the carpet (there’s two other dogs there, it happens). My young nephews are hilarious and fun but Dylan being the only male relative who can talk video games with them, gets bombarded all day long. It takes a fair bit out of us, we homebodies, but typically it’s worth it.

Last week we started tossing around menu ideas. He loves lamb more than I do and while I do like it, five bites or so and the quantity of the intense flavor becomes too much. I love ham but he doesn’t really care about it, I wanted prime rib but it doesn’t do a whole lot for him, and neither of us care about turkey. We tabled the topic, revisited it, came to no decision, repeat. For a week.

So yesterday in the effort to price some options, we went test-grocery shopping, having not yet committed to anything but the sides. Lamb? Ham? Prime Rib? There were drawbacks to all and we couldn’t seem to agree. While perusing the meat department, found a sirloin roast. “Yorkshire Pudding” popped immediately into my head. Then mushy peas. Then some buttery mash. I mentioned these items to Dylan and his eyes lit up… wait a minute, are we planning a Traitor’s Thanksgiving? Yes, yes we are.

This revision to the original sort of plan is cutting my shopping list in half which was a welcome surprise, but is also leaving me feeling a little weird. I am fighting the urge to pick up a turkey tenderloin since I have a fantastic marinade recipe for it but then I need gravy and stuffing. That is too much food for just two people in spite of the guaranteed leftovers (which is appealing since we are terrible about making enough of anything to have leftovers). With that said, I still have to hit up the only grocery store I know of that will likely carry turkey tenderloins, and there’s a good chance I won’t be able to avoid having turkey on Thursday after all. Some traditions are simply too difficult to ignore.

Like this one, which no matter from whose nation we may borrow food traditions, will always have a place at my table: cran

In cruising Pinterest and making my final grocery list, I admit that I am becoming more and more excited about it all. I plan to bake while Dylan’s at work now that I have additional counter space thanks to his Dremmel, a spare piece of Masonite, and my existing wire rack. I will likely listen to Christmas music while I do it, sip some coffee with Bailey’s or maybe a mimosa, and run dialog of my cooking show to the dog.

Pictures of the ingredients, process, and feast to come. Happy Thanksgiving, all.